Getting Started
How Traffic Lite Works
From installation to implementation, Traffic Lite fits directly into the Google Classroom workflow teachers already use.
1. Install & Sign In
2. Set Your Policy
3. Implement Your Policy
4. Admin Insights
1
Get Started
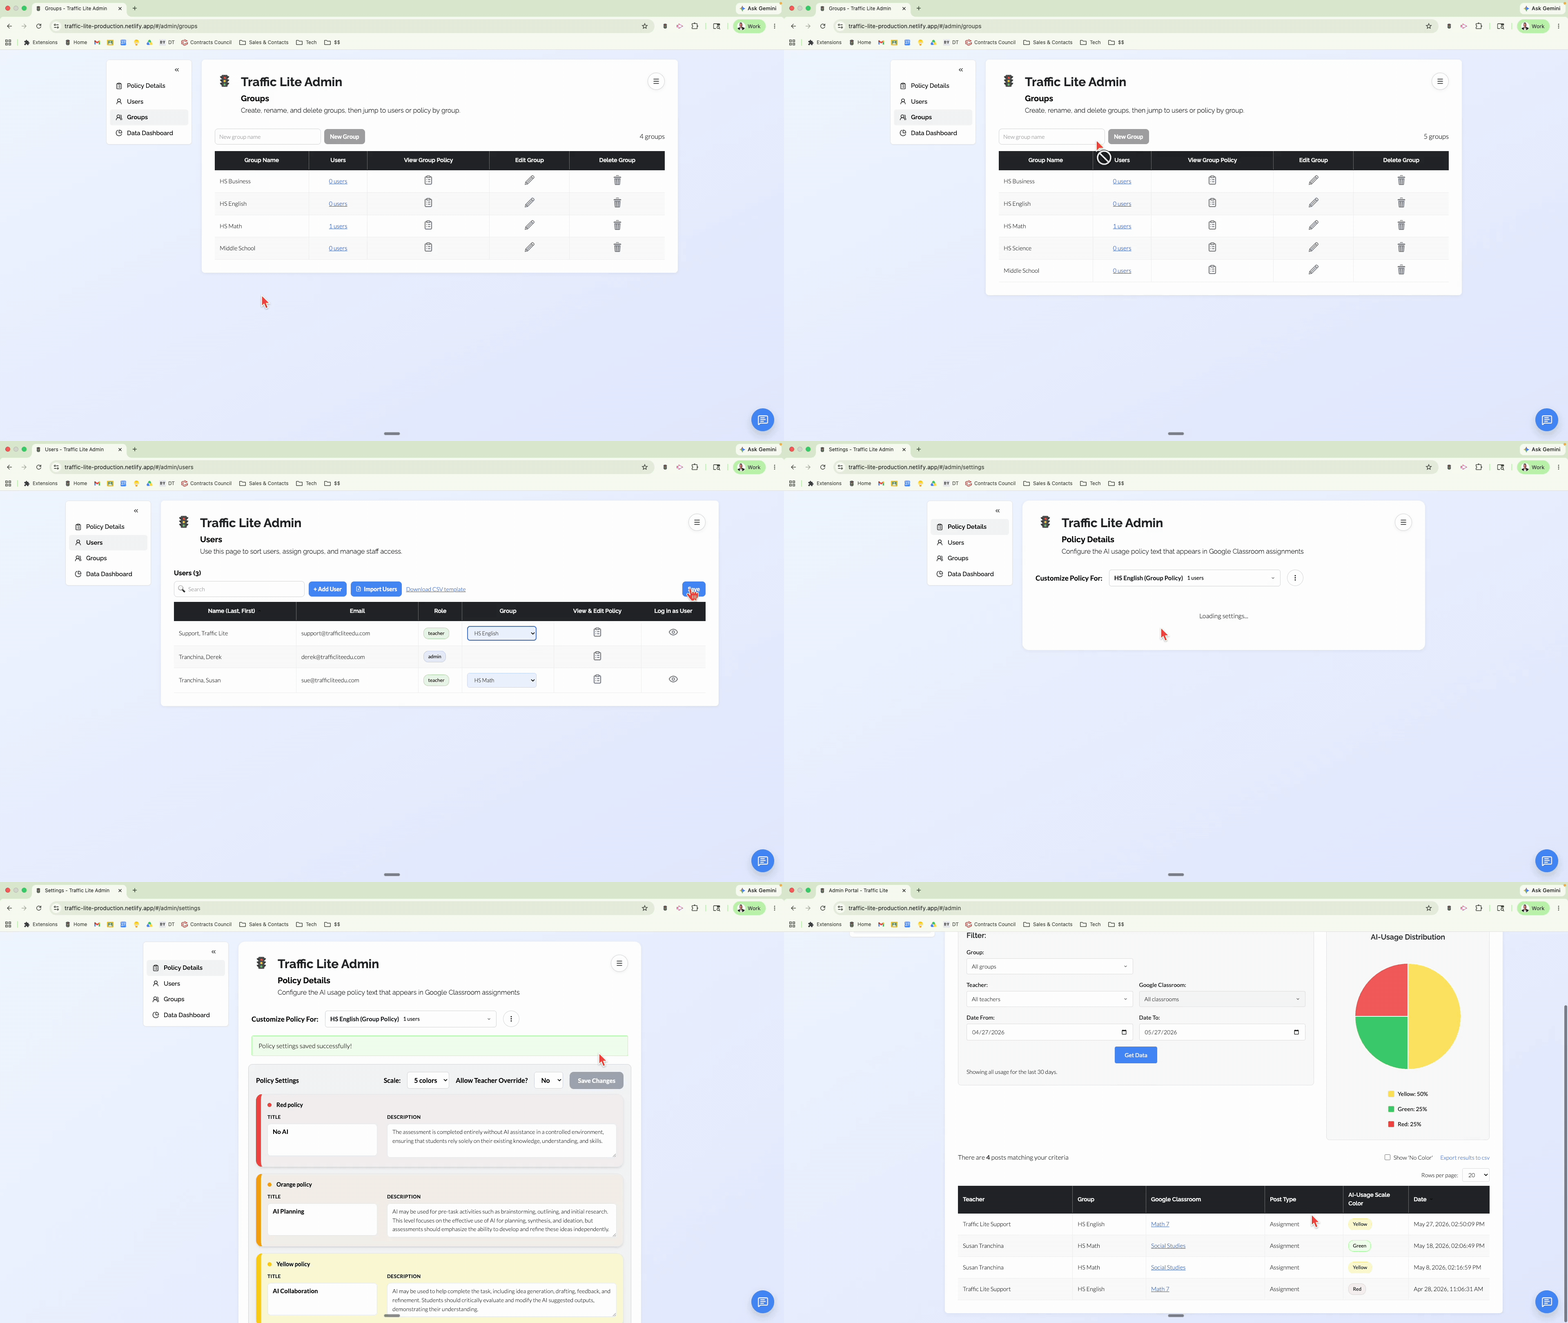
Install & Sign In
- ✓ Install the Traffic Lite Chrome Extension .
- ✓ After installation is complete, click the Traffic Lite extension icon in your Chrome toolbar and sign in.
For schools and districts:
technology leaders can also deploy Traffic Lite to teachers through
the Google Admin Console instead of sharing the installation link individually.
2
Customize
Set Your Policy
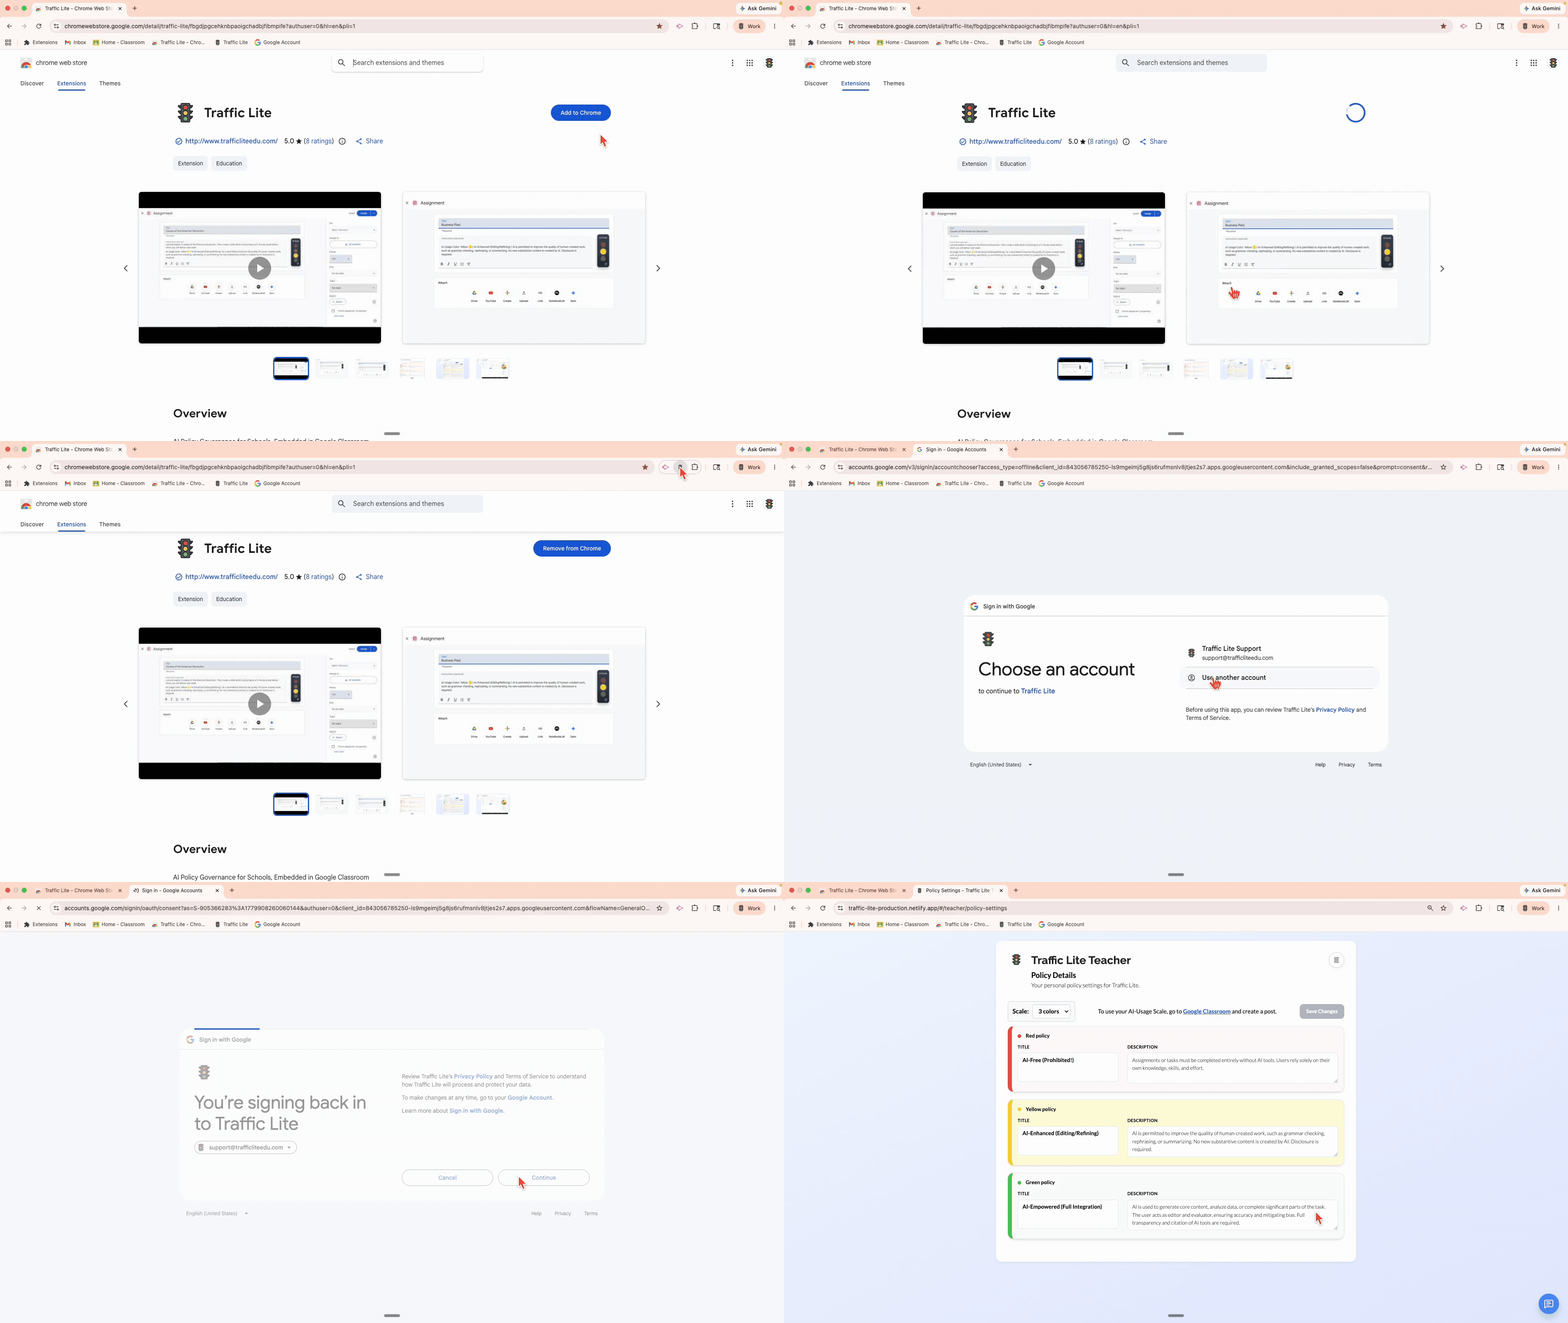
- ✓ Click the Traffic Lite extension icon in the Chrome toolbar to open your dashboard.
- ✓ Open Policy Details to customize your AI-usage policy.
- ✓ Customize the policy titles and language as needed for your classroom.
Choose the scale that fits your approach:
2 colors: 🔴 🟢
3 colors: 🔴 🟡 🟢
4 colors: 🔴 🟠 🟡 🟢
5 colors: 🔴 🟠 🟡 🟢 🔵
3
Use It in Classroom
Implement Your Policy
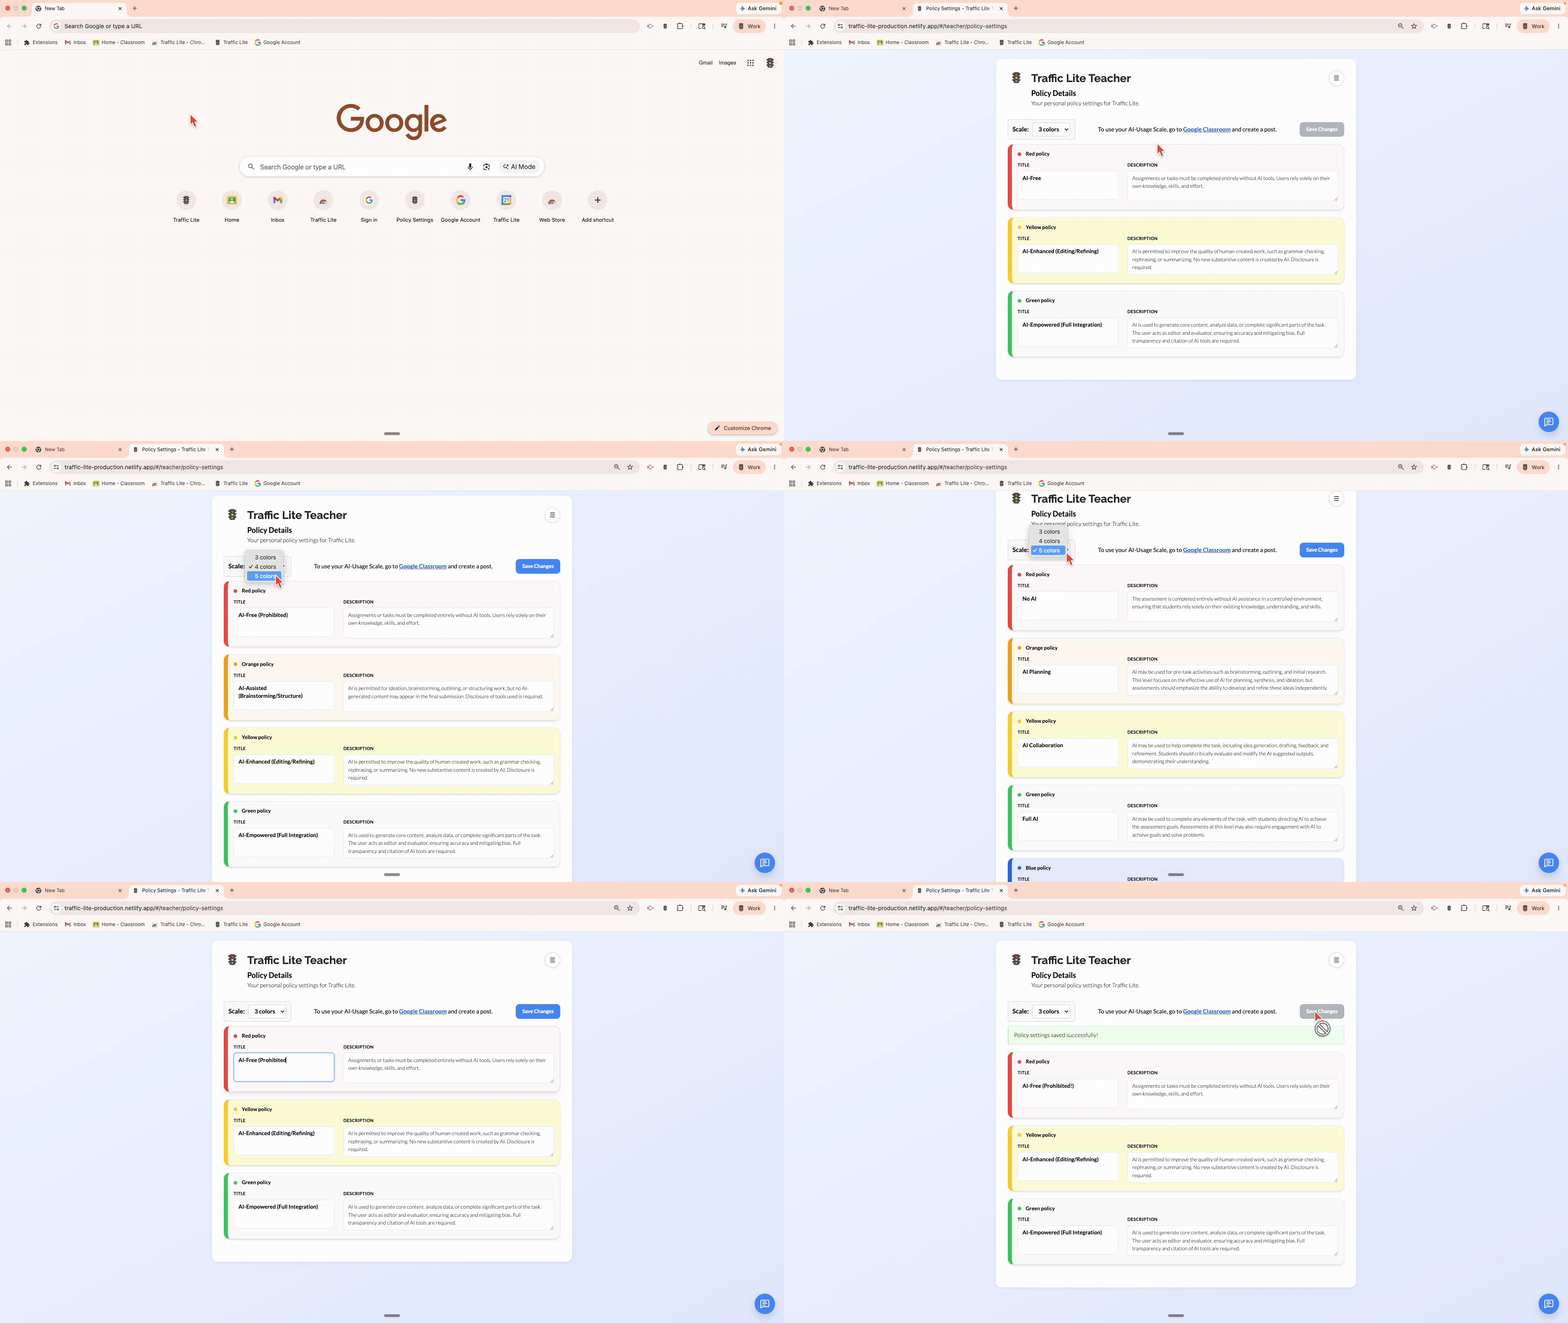
- ✓ In Google Classroom, teachers automatically see the Traffic Lite AI-usage widget while creating Assignments, Quiz Assignments, Questions, and Materials.
- ✓ Simply select a color to insert the corresponding AI-usage policy directly into the Google Classroom post.
- ✓ Students see the color-coded AI-usage guidance directly within their Google Classroom instructions.
The goal: students don't have to guess whether AI is allowed.
The expectation travels with the assignment.
4
Admin Insights
Manage at Scale
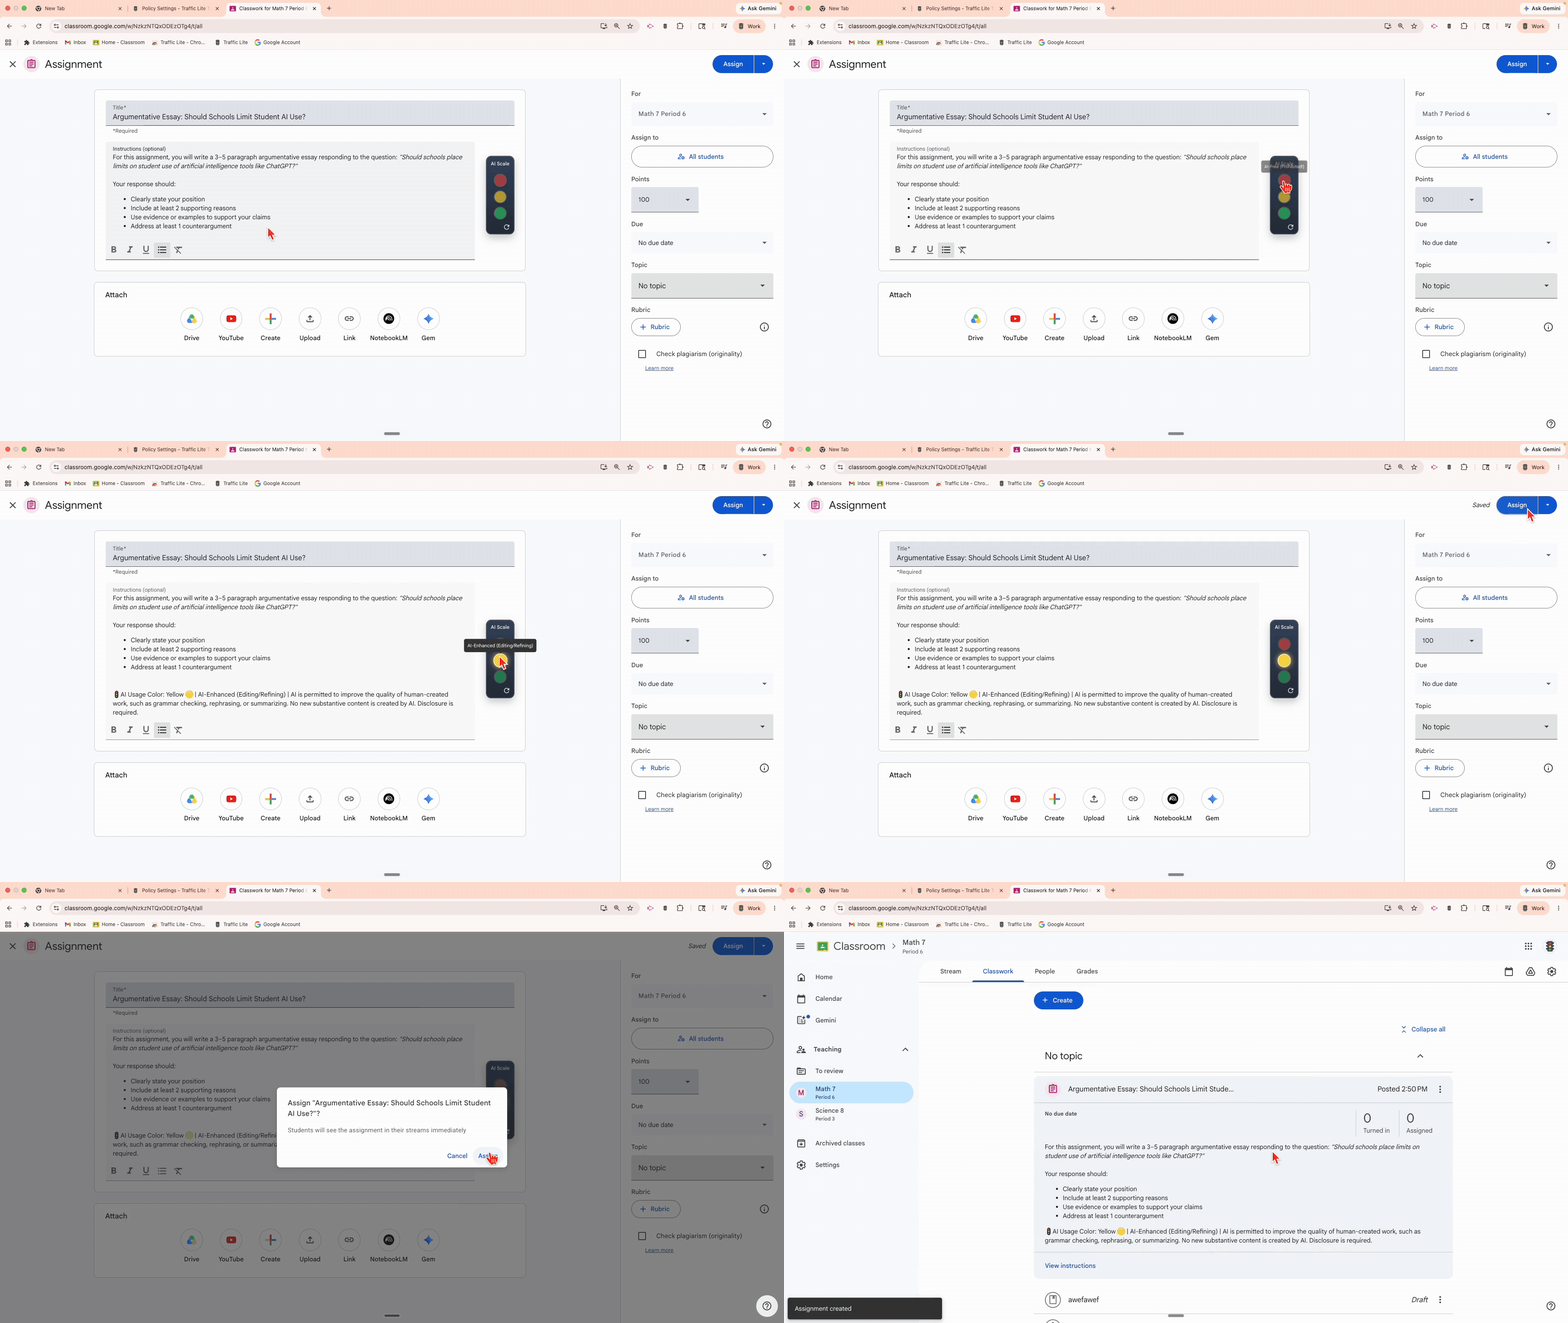
- ✓ Admin users can view teacher policies and manage AI-usage expectations across their domain.
- ✓ Set or lock policies, or create custom groups with their own policies.
- ✓ View usage data to better understand how Traffic Lite is being implemented across classrooms.
- ✓ Sync with Google Workspace or upload users via CSV to seamlessly create and organize users and groups.
- ✓ Admin Suite pricing is based on the number of teacher and administrator accounts needed.